 A Flexible CMS
The previous post on the PHP Bridge Design pattern shows how a Bridge pattern has two connected but independent interfaces to make design flexibility for different online devices. This post explores how that same flexibility extends to making a Content Management System (CMS). Most of the Bridge participants in the design are unchanged or only slightly changed.
The major change in the Bridge design pattern actually makes it more in line with the original intention of the Bridge. The RefinedAbstraction participant (RefinedPage) no longer includes concrete content for the page. Instead, it provides the parameters for a client to add the content. This change adds flexibility and gives the developer more options than the original StandardPage class.
Two UIs and Multiple Clients
In order to make a decent CMS, you need to have at least two UIs:
- An Administrative UI for previewing and adding new content
- A User UI for viewing but not changing content
In creating the Administrative UI (HTML5/PHP/JavaScript), I had to use two PHP clients. One client is to preview the new data entered by the admin and the other client is to store the new data (after previewing and possibly editing it). Figure I provides a general overview of the UIs and the Clients that will use the Bridge pattern for a CMS:
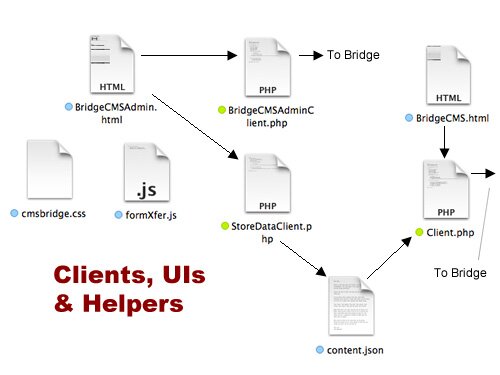
Figure 1: User Interfaces and Clients
The Administrative UI (BridgeCMSAdmin.html) uses the BridgeCMSAdminClient class for displaying different content and the StoreDataClient class for storing the information in a JSON file. An important condition to remember is that when using JSON files, you need to make their permissions available for reading and writing. (See the Memento II post and the special mini-post on setting permissions on Raspberry Pi systems.) Thus, the need for two clients; one for previewing new material and another for storing it in a JSON file. A lot of files are involved in this CMS; so take a look at the two different UIs and download the files for everything:
![]()
![]()
![]()
To use the Administrator Module, follow these steps in the listed order:
- Type in Header data, select a graphic from the drop down menu, and then type in text for the body.
- Click a Desktop, Tablet or Phone radio button and then click Preview Page
- When you have everything the way you want it, First click Transfer to Storage and next click Store Data
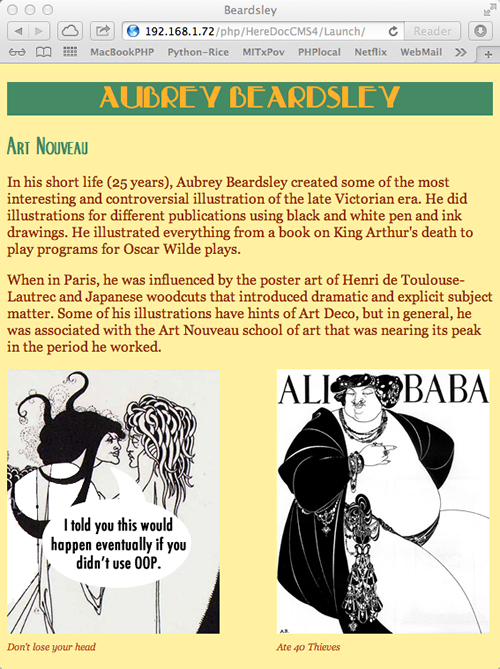
- Now click the Play button and see the page you created.
In the admin UI, I used a drop down menu with only three selections for the graphic file since only three were set up. However, it would not be difficult to upload graphics and their file names. (See the post on uploading graphics using the Template Method.)
The UIs and their Clients
The main feature in creating a CMS is the Administrative UI. It calls two different clients for dealing with previews and persistent data storage. Unless you’re planning on a fairly long body text entry, the JSON file works fine. Look at the code below, and you can see that one of the issues is that the data that is entered for the preview must be transferred to a different form. It transferring the data is a simple task with a little JavaScript. The following script is all it takes:
function transferData(formNow) { formNow.header.value = bridgeWork.header.value; formNow.graphic.value = bridgeWork.graphic.value; formNow.bodytext.value = bridgeWork.bodytext.value; } |
Stored in an external JS file, it was used only when the data was going to be stored; however, before storing it, it had to be transferred from the bridgeWork form to the dataStore form.
< !DOCTYPE html>
Store New Data |
Then using build-in PHP JSON json_encode() method, the data were placed into an array and stored in the JSON file. This was done using the StoreDataClient class:
< ?php class StoreDataClient { private static $dataStorage=array(); private static $jsonFile="content.json"; //Client stores data public static function store() { if (isset($_POST['jsonstore'])) { self::setStore(); } file_put_contents(self::$jsonFile,json_encode(self::$dataStorage,JSON_UNESCAPED_UNICODE)); } private static function setStore() { //Pushes data from HTML to array array_push(self::$dataStorage,$_POST['header'],$_POST['graphic'],$_POST['bodytext']); } } StoreDataClient::store(); ?> |
Just in case you’re wondering why a single PHP client class was not used for both preview and storage, it’s simple:
OOP Principle: Each class should have only a single responsibility.
We don’t want to cram classes; so each responsibility has its own class. (Click below to see the other client and the rest of the CMS.)
Continue reading ‘PHP Bridge Pattern CMS’
 A Simple Factory Method CMS

 Load Up the Graphic Files
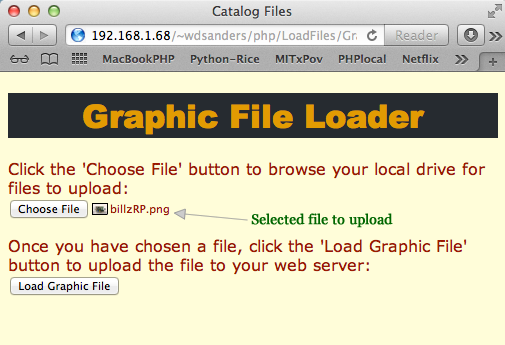
 Bring in the MySql
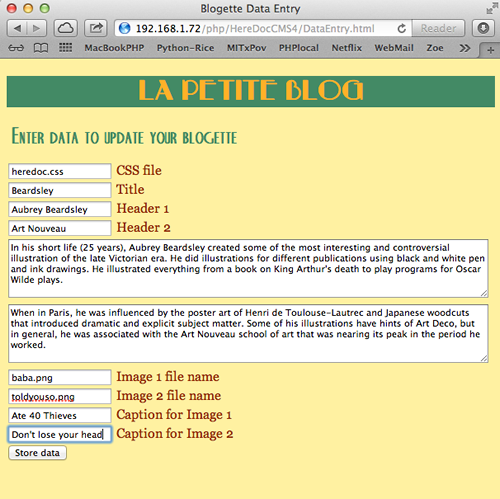
 Solve Once; Use Often
Recent Comments