 PHP Game Mechanics
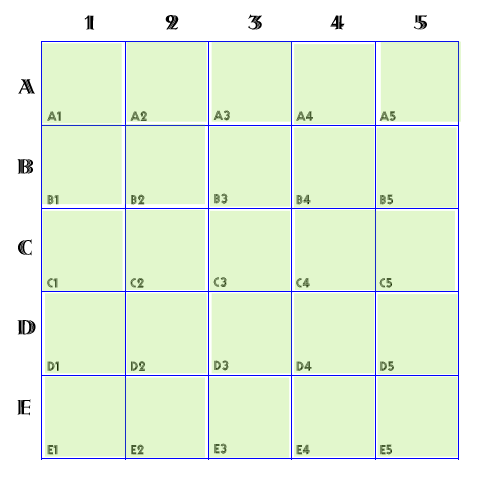
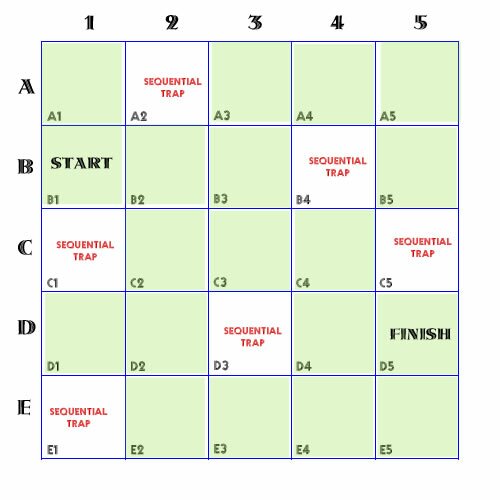
In Part I of this “State Maze” series, you see that each cell in the matrix is a coordinate on a grid, and using the alphanumeric coordinate designation, each implementation of a state interface (class) is named with a grid coordinate. (If you have not looked at Part I, do so now.)
The problem with using an HTML UI (See Part I) is that each time the player makes a move, it generates a new instance of the client that makes the move in the State pattern. As a result, I had to create a Json file to store each move. This solution still does not allow the same instance to be re-used and keep a running record of where the player is, but I haven’t found a satisfactory solution elsewhere. (I’m looking at Ajax and RESTful APIs, but nothing yet.) If you’ve developed games with ActionScript (of Flash fame) or Python, you can easily keep a running record in a class property without re-instantiaing the class in a variable. Ironically, by placing the HTML code in a PHP heredoc string, the class with the HTML in it does not have to be re-instantiated, but the client it launches does. To get started, go ahead and play the maze-game and explore the different OOP and Design Pattern principles and languages that use OOP. You will be asked to provide a “seeker” name. The default name is “chump.” Don’t use that name! (Don’t be a chump…) Use a 5-letter name of your own. It will be used to track your progress through the maze.
![]()
![]()
This is not an easy maze (nor does it follow the route of the maze in Part I.) So, keep track of your moves, and if you fall into a sequential trap, you have to start over.
State Overview
If you review the State design pattern, especially the class diagram in Design Patterns: Elements of Reusable Object-Oriented Software by Gamma, Helm, Johnson and Vlissides (AKA “The Gang of Four” or GoF) you will see that the Sate pattern consists of Context, State Interface and Concrete States implementing the State Interface. In other words, it’s one of the least complex-looking patterns among design patterns.
Figure 1 shows a file diagram of the current implementation; however, the additional files beyond the basic pattern implementation are files with helper elements for CSS and Json.
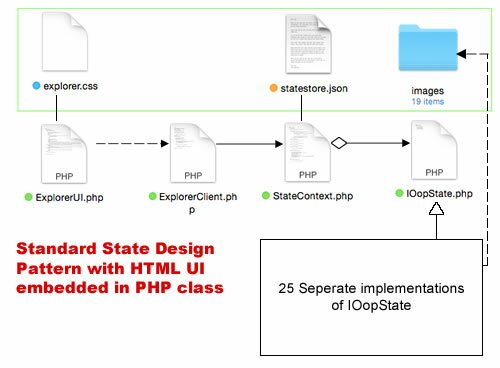
Figure 1: File Diagram
With a maze, the State design does require a lot of files — one for each state, and some would prefer a table look-up for dealing with a maze-type application. However, a table look-up has its own issues, and making changes and adding actions can tie a table in a knot. Besides, it’s much easier to re-use a state pattern by changing the method calls within each state without even having to change the context or client at all. Further, since all of the states implement the same interface, once one implementation is completed, it can be copied and pasted, changing only the name of the class and the behavior of the implemented methods defined by the interface. As can be seen in Figure 2, the State pattern used in this implementation adheres to the fundamentals of the State Design Pattern as proposed by GoF.

Figure 2: State Class Diagram
Each of the state implementations are designated A1State to E4State. (See the labeled grid in Figure 2 in Part I). Of course, while the State design pattern diagram is relatively simple, the Context can be challenging, especially when using a Json file for recording moves. However, to get started with the code, we’ll start at the beginning with the UI and the Client that makes requests to the State pattern.
The UI and Client
The UI is an HTML5 document embedded in a PHP class and is more of an HTML document than a PHP one. A heredoc string (EXPLORE) is placed in a PHP private variable, $explorerUI. An echo statement displays the HTML on the screen when the $worker variable instantiates the PHP class.
< ?php class ExplorerUI { private $explorerUI; public function __construct() { //Use the Security object to encode table $this->explorerUI=< <<EXPLORE DOCTYPE html> <html> <head> <link rel="stylesheet" type="text/css" href="explorer.css"/> <meta charset="UTF-8"/> <title>OOP Caverntitle> head> <body> <h2>OOP Explorerh2> <h3>Explore Next Directionh3> <fieldset> <legend>Move Optionslegend> <form action="ExplorerClient.php" method="post" target="cavestate"> <table> <tr><td>td><td><input type="radio" name="move" value="northMove"/> Move Northtd><td>td>tr> <tr><td><input type="radio" name="move" value="westMove" checked="checked"/> Move Westtd><td>td><td>td><td><input type="radio" name="move" value="eastMove"/> Move Easttd>tr> <tr><td>td><td><input type="radio" name="move" value="southMove"/> Move Southtd><td>td>tr> table> form>fieldset><p>p> <input type = "text" name="seeker" maxlength="5" size="6" value ="chump"/>  Your seeker name: Five characters; no spaces<p>p> <input type="submit" class="submit" name ="makemove" value ="Make your move"/> <p>p> <iframe seamless name="cavestate" width="500" height="450">CaveStateiframe> body> html> EXPLORE; echo $this->explorerUI; } } $worker=new ExplorerUI(); ?> |
I used a table for setting up the UI “move center” to make it easy for the player to select the next move. (A CSS form for the move center certainly would be more elegant, but the table worked ok; so I used it after testing it on a desktop, tablet and smartphone.) You can see how the UI looks in Figure 1 in Part I of the State maze).
Continue reading ‘State Maze Part 2: Play’
 For the last ten weeks I’ve been learning functional programming and Haskell through an edX
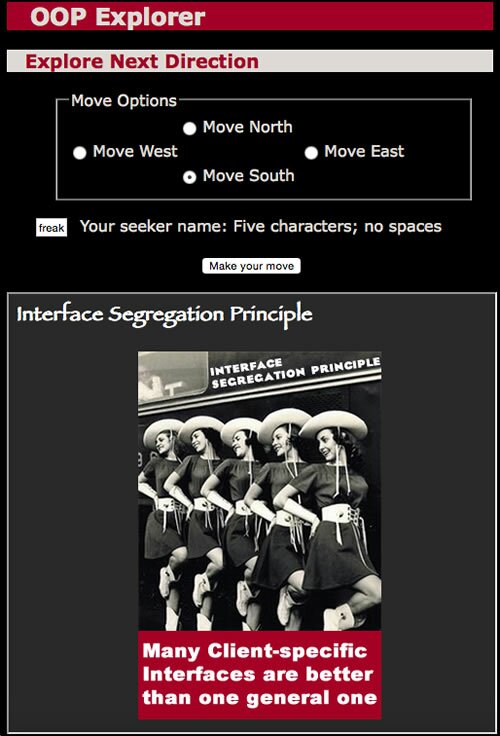
 A Flexible CMS
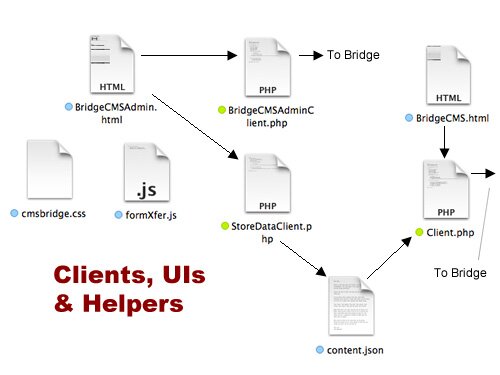
 Easy as Pi
 With a Little Help from Our Friends
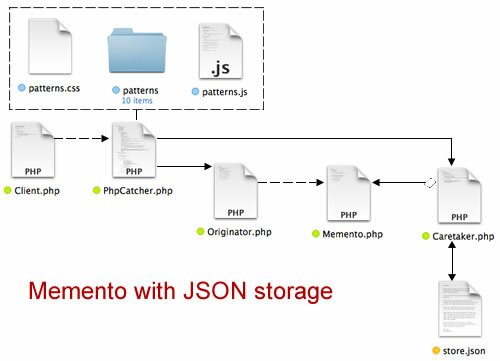
Recent Comments