 An Easy Start
A lot of starting concepts in OOP seem designed to confuse and warn off developers who want to move up to OOP from sequential and procedural programming. This post is to give you a bit of what was presented at the NE PHP & UX Conference and to provide a simple yet clear introduction to OOP applied to PHP.
The easiest way (and least confusing) is to begin with the idea of “objects” and communication between objects. As you may know, objects are made up of classes containing “properties” and “methods.” Properties look a lot like PHP variables and methods like functions. So, think of properties as things a car has–like headlights, a steering wheel and bumpers, and think of actions your car can take, like turning left and right or going forward and reverse as methods.
The “blueprint” for an object is a class, and when a class is instantiated in a variable, it becomes an object. Objects communicate with one another by access to public properties and methods.
At the 2014 NE PHP & UX Conference in Boston, I told those at my session that I’d have some materials for them, and so you can download them here. One is a folder full of examples from my session and the other is an introductory book (in draft form) for getting started in OOP for PHP users. Also, the Play buttons runs the little example program for this post.
![]()
![]()
![]()
A Request-Fulfill Model
At the heart of OOP is some system of communication. The simplest way to think about communication between objects is a request-fulfill model. A client makes a request to an object to get something. The request can originate in the user UI, and it is passed to a client who finds the correct class and method to fulfill the request. Figure 1 shows a file diagram with an overview of this model:
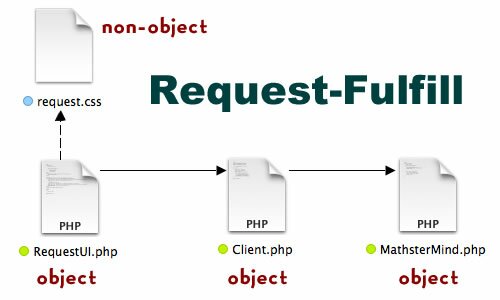
Figure 1: Object communication
In Figure 1, you can see that the only non-object is the CSS file (request.css), and so in a way, you’re used to making requests for an external operation if you’ve used CSS files. However, CSS files are not objects but rather depositories. Likewise, external JavaScript (.js) files can be called from HTML documents for use with Web pages, but they too are not objects.
Encapsulating HTML in a Class
With PHP, the UI is handled by HTML, but that does not mean that it cannot be encapsulated in a PHP object. Encapsulation is not accomplished by simply adding a .php extension to the file name, but rather, fully wrapping the HTML in a PHP class. The easiest way to do that is with a heredoc string. The following example shows how a fully formed HTML5 document is encapsulated:
Listing #1:
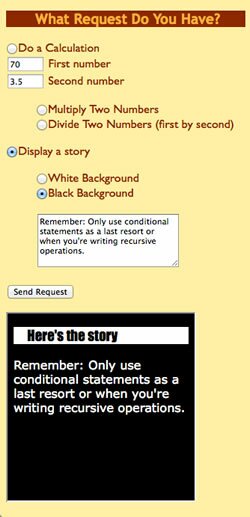
< ?php class RequestUI { private $ui; public function request() { //Heredoc wrapper $this->ui=< <<UI DOCTYPE html> <html> <head> <link rel="stylesheet" type="text/css" href="request.css"/> <title>Requesttitle> head> <body> <h3>Mathster Mind:<br /> The UI Class & Method Requesterh3> <form name='require' action='Client.php' method='post' target='feedback'> <input type='hidden' name='class' value='MathsterMind'/> MathsterMind Class<br /> <input type='text' name='num' size='6'/> Enter value <br /> <fieldset> <legend>Methodslegend> <input type='radio' name='method' value='doSquare'/> Square the value<br /> <input type='radio' name='method' value='doSquareRoot'/> Find the squareroot of the value<br /> fieldset><br /> <input type='submit' name='send' value='Make Request'/> form> <iframe name='feedback'>Feedbackiframe> body> html> UI; echo $this->ui; } } //Instantiate an object from the class $worker=new RequestUI; //Call the public method from the instantiated object $worker->request(); ?> |
The key aspect of encapsulating HTML in a class is the heredoc wrapper:
//Heredoc wrapper
$this->ui=<<
UI;
A heredoc string begins with three less-than symbols (they look like chevrons laid on their side), the name you give the heredoc string and it ends with heredoc string name fully on the left side of the source code and terminated with a semi-colon. Typically, the heredoc string is assigned to a variable ($this->ui). The great thing about using heredoc, is that you can develop and debug your HTML document, and once it’s all ready, you just paste it into a heredoc wrapper. Now, instead of a free range chicken running around with snippets of PHP code, you have a fully encapsulated object. Thus, your UI is a PHP class with all of the possibilities and security of a well formed class. (Click below to see how requests are “caught” by a PHP client.)
Continue reading ‘PHP Introduction to OOP: UI-Client-Request’
 With a Little Help from Our Friends
 Can We Talk?
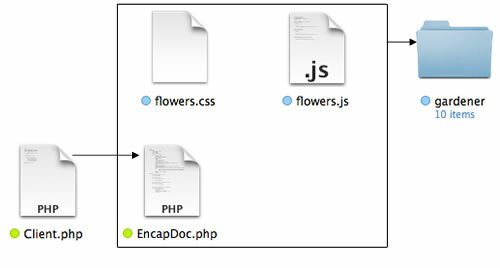
 Back to Basics
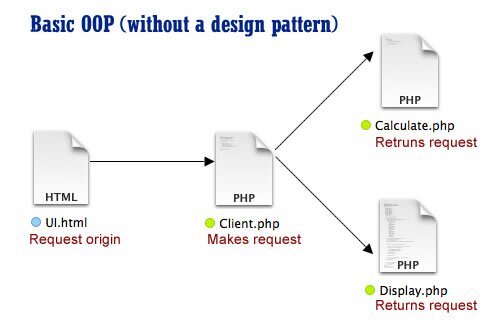
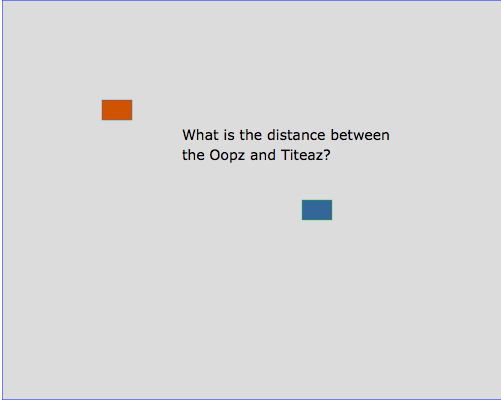
 Distance in 2D Space
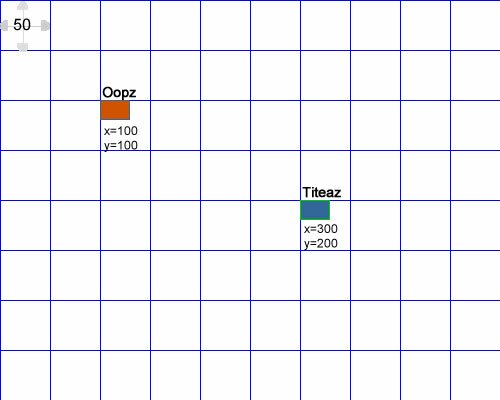
Recent Comments